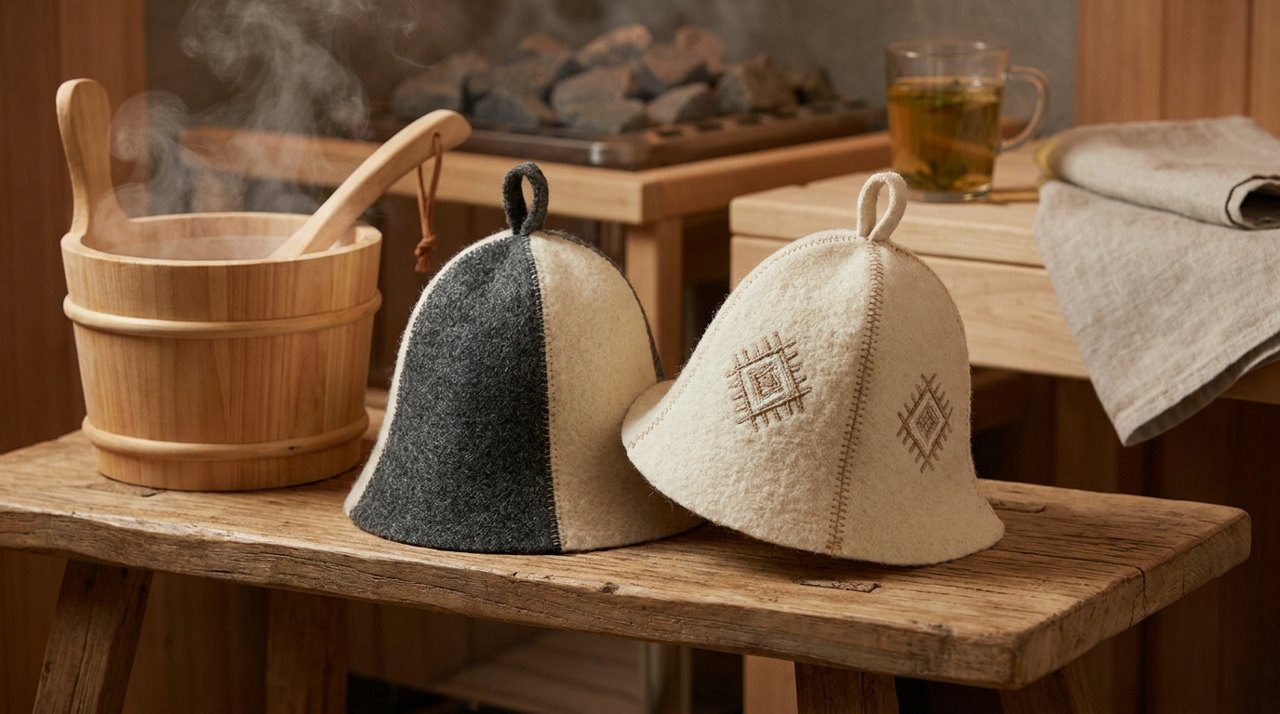
Walk through any traditional Russian banya or Estonian sauna club and you'll see them: felt hats with embroidered names, contrast-color bands, little wool flowers stitched on the crown. Decoration on a sauna hat isn't just vanity — in a communal steam room where twenty grey felt cones hang on identical pegs, it's how you find yours. But the sauna is a brutal environment for ornamentation. At 90°C and near-total humidity, with sweat soaking through and regular hand-washing afterward, most decorative techniques fail within a season. Here's what survives, what doesn't, and why the answer almost always comes down to one rule: decorate wool with wool.
Why the sauna destroys most decoration
Think about what a decorated hat endures. Heat at the ceiling of a proper sauna runs 80–110°C — hot enough to soften most adhesives and plasticize vinyl. Then the hat absorbs sweat and steam, swelling the felt fibers slightly with every session. Then it dries, contracting again. Then, every few weeks, it gets a hand-wash in cool water with wool soap. Any decoration that isn't structurally part of the hat — glued, ironed-on, or attached with synthetic backing — is being pried loose by this expand-contract cycle from day one.
The felt itself handles this abuse beautifully, which is exactly why sauna hats are felt in the first place (we cover the mechanics in why sauna hats are always felt, not knit). The trick is choosing decoration that behaves like the felt: same fiber, same shrink behavior, same tolerance for heat and moisture.
Wool-on-wool embroidery: the technique that lasts
Traditional sauna hat embroidery uses wool yarn or wool crewel thread stitched directly through the felt. This works for reasons that are almost boringly practical:
- Identical heat tolerance. Wool thread chars at the same point the hat does — well above anything a sauna produces. It won't melt, stiffen, or go brittle. (Wool's remarkable fire behavior is a story of its own — see why wool is the fire-safe choice for the hot room.)
- Identical moisture behavior. Wool thread absorbs and releases water at the same rate as the felt around it, so the embroidery expands and contracts with the hat instead of fighting it. Cotton thread, by contrast, swells more when wet and can pucker the felt over time; polyester thread doesn't move at all and eventually cuts into the softening wet fibers around it.
- It felts in. This is the quiet magic. Every steam session lightly agitates wet wool fibers, and wool fibers under heat and moisture do what they always do: they interlock. After a few months of sauna use, wool embroidery is no longer sitting on the hat — it has partially fused into the surface. Old banya hats often have embroidery you couldn't remove with a seam ripper.
Stitch choice matters less than thread choice, but chain stitch and stem stitch are the traditional workhorses for names and outlines, with satin stitch for small filled motifs. Keep filled areas small — a large satin-stitched patch traps sweat against the head and dries slower than the surrounding felt.
One caveat on color: embroidery yarn is dyed, and cheap dyes can bleed when the hat is soaked in sweat and steam. Good makers use fiber-reactive or acid dyes that are fixed properly; if you're embroidering a hat yourself, test the yarn by soaking a length in hot water on a white cloth first. The same logic applies to the hat body itself — we go deeper in our guide to dyes, sweat and colorfastness in the heat.
Two-tone and contrast band construction
The other durable decoration isn't applied at all — it's built in. Two-tone hats come in a few structural flavors, and it's worth knowing the difference when you're shopping:
| Construction | How it's made | Durability |
|---|---|---|
| Felted-in color blocks | Different-colored wool layered during wet felting; colors are fused as one continuous felt | Excellent — it's one piece of fabric, nothing to detach |
| Sewn contrast band | A separate strip of felt stitched around the brim with wool or strong linen thread | Very good — check stitching, not the band, for wear |
| Glued or fused band | Trim attached with adhesive or heat-bonded backing | Poor — expect peeling within 10–20 sessions |
Felted-in color is the gold standard because there is no seam and no thread — the maker lays contrasting fleece into the layout before felting, and the fibers lock together permanently. If you're curious how that layering works, our walkthrough of how sauna hats go from fleece to felt covers it step by step. A well-sewn band is nearly as good, and it has one advantage: a skilled repairer can restitch it in twenty years when the thread finally gives out.
One thing to check on any two-tone hat: both colors should be the same wool, felted to the same density. A merino band on a coarse-wool body will shrink at a different rate over years of washing and slowly distort the brim. Natural undyed contrasts — grey body, white band, or brown accents — sidestep dye questions entirely, since the color variation comes from the sheep, not a vat.
What doesn't survive: the failure list
Learned mostly by watching other people's hats fall apart on the bench:
- Heat-transfer vinyl (HTV). The iron-on lettering popular on novelty hats is applied at roughly 150°C — but it's designed for garments that live at room temperature. Repeated 90°C sessions plus flexing wet felt means peeling corners by month two, then a sad half-name by month six.
- Glued appliqués and rhinestones. Hot-melt and craft adhesives soften right in the sauna's operating range. Sweat gets under the edges. They fall off, usually onto the hot stones, where they smell terrible.
- Screen printing. Plastisol inks sit on the surface of the felt rather than penetrating it, and they crack along fold lines as the hat is squeezed dry after washing.
- Synthetic patches with plastic backing. The embroidery on top may be fine; the stiff backing delaminates. If you love a patch, cut the backing story short: stitch it on all the way around with wool thread and accept it will outlive the glue that came with it.
- Beads and metal charms. Metal in a sauna gets hot enough to genuinely sting — the same reason you take your jewelry off before the hot room applies to your hat.
The pattern is obvious once you see it: everything that fails is either synthetic, adhesive-based, or thermally conductive. Everything that survives is wool attached with wool. It's the decoration version of the broader material argument we make in wool vs synthetic sauna hats.
Personalization: why an embroidered hat is the best sauna gift
Here's the honest gift-giving math. A plain quality felt hat — something like the DIVELUX's classic wool hat in natural grey — is already a good present for anyone with sauna habits. Add a name, initials, or a small motif in wool thread and it becomes something else entirely: a hat nobody else can walk off with, in a setting where identical hats hang side by side and mix-ups are constant.
A few practical notes if you're personalizing one:
- Embroider before first use if you can. Fresh, dense felt takes stitches cleanly. A hat that's been through fifty sessions has a fuzzier, felted-down surface that's harder to mark and stitch evenly.
- Keep it on the lower third. The crown is where heat load is highest and where the hat gets grabbed; names and motifs near the brim wear better and read better on the bench.
- Use a blunt tapestry needle and wool crewel thread. Sharp needles cut felt fibers; blunt ones push between them, which keeps the felt strong around each stitch.
- Skip embroidery hoops. Thick felt doesn't need tensioning, and a hoop will leave a crease in a conical hat.
If you'd rather buy the color than stitch it, look for a maker offering felted-in two-tone designs — natural greys, whites and browns are the safest and, to my eye, the best-looking. The all seven colors covers the classic natural-tone range, and the grey classic is also available on Amazon if that's your faster shipping route before a birthday.
Caring for a decorated hat
Good news: if the decoration is wool-on-wool or felted-in, care is identical to a plain hat — air-dry after every session, occasional hand-wash in cool, room-temperature water with wool soap, no wringing, no machine, no radiator drying. Two small additions. First, when washing an embroidered hat, don't scrub across the stitching; press soapy water through it instead. Second, dry the hat on a form (a jar or a balled-up towel works) so a sewn contrast band dries at the same tension as the body and the brim keeps its line.
A well-made decorated hat should last as long as a plain one — five to ten years of regular use is realistic with decent care. The embroidery will soften, fuzz slightly, and settle into the felt until it looks like it grew there. That patina is the whole point: a glued vinyl name says someone bought a hat; a felted-in embroidered name says someone has used one, hundreds of times, and it's still going.