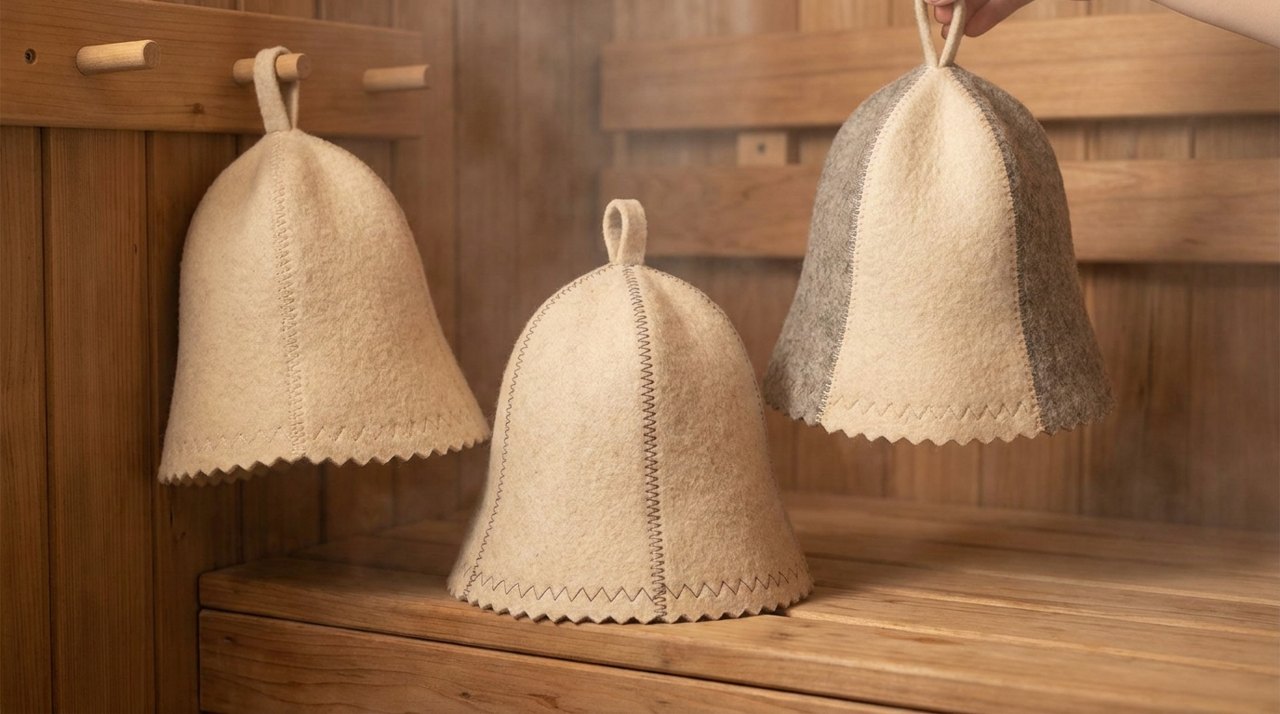
Most sauna hat reviews talk about wool percentage and felt thickness. Almost none of them mention the seams. Yet the seam is where a hat fails first: a stitched brim that unravels after twenty sessions, a hanging loop that tears loose, a panel join that opens up along the crown. Once you know what to look for, the construction tells you more about a hat's lifespan than any label does.
Every wool sauna hat is made one of two ways. Either the felt is formed as a single piece over a mold, or flat felt is cut into panels and sewn together. Both can be good. But they fail differently, and knowing which one you are holding changes what you should inspect.
A molded seamless hat starts as loose fleece laid around a resist or a hat block, then wet-felted until the fibers lock into a continuous bell shape. There is no join anywhere in the crown, so there is nothing to split. The weak points shift to the brim edge, which is usually left raw or lightly finished, and to any loop that gets stitched on afterward. This is the traditional Russian and Finnish method, and it is how the hand-felting process has worked for centuries.
A stitched panel hat is cut from sheet felt, usually four to six wedge-shaped pieces sewn together up to the crown. It is faster to make and easier to keep consistent in size. The trade-off is that you now have several meters of seam running through the hottest, wettest part of the hat, and every centimeter depends on the thread.
| Feature | Molded seamless | Stitched panels |
|---|---|---|
| Crown joins | None | 4 to 6 seams meeting at the top |
| Typical weak point | Brim edge, hanging loop | Seam thread, crown junction |
| Size consistency | Varies slightly piece to piece | Very uniform |
| Repairability | Hard to fix if felt tears | Seams can be resewn |
| Signs of handwork | Slight asymmetry, fiber texture | Hand-blanket stitch, visible knots |
Felt shrugs off sauna conditions. Thread often does not. A hot room cycles between dry heat near 90°C and damp cooling-off periods, and a hat picks up a surprising amount of sweat each session. The thread holding a panel hat together lives through the same cycles, and different fibers react differently.
Puckered seams are the easiest defect to spot in a used hat. If the panels look tight but the seam line wavers or ripples, the thread and the felt have shrunk at different rates.
The brim edge is what you grab to put the hat on and pull it off, and it is where a hat rests when you set it upside down on a bench. On a molded hat, a good maker either leaves the felt extra dense at the edge or folds and stitches a narrow hem. On a panel hat, the brim is usually a separate band sewn around the bottom, and this join carries more stress than any other.
Look for a brim that is visibly thicker than the crown, or a double row of stitching around the edge. A single line of straight machine stitching on a thin brim will start to fray at the raw felt edge, and once the edge frays, the stitches have nothing to hold. A reinforced brim also helps a hat keep its shape when it is drying, which matters for the total years you get out of it.
Almost every sauna hat has a loop at the crown for hanging on a peg. It seems trivial. It is also the single most frequent point of failure I have seen, because people hang a wet, heavy hat by it every session.
A loop can be attached three ways:
Cotton or wool cord loops are better than nylon webbing. Nylon does not absorb water, so the wet felt around it stays wet longer and the stitching there suffers more.
You rarely get to handle a hat before buying, so you have to read the listing. A few things are worth zooming in on:
The DIVELUX wool sauna hat is a useful reference point here because it is a molded, single-piece felt with the loop set into the crown rather than tacked on, and the listing shows the inside surface clearly. The same construction runs through the DIVELUX sauna hats collection. If you are comparing listings, its page on Amazon has enough close-up reviewer photos to check the brim and loop against the points above.
"Handmade" appears on a lot of listings, and it is worth knowing what it actually looks like so you can tell the real thing from a marketing word.
A hand-felted hat is never perfectly symmetrical. The brim may be a few millimeters wider on one side. The surface has visible fiber direction and small variations in density if you hold it to the light. The brim edge is often left as felted, slightly rounded rather than cut sharp, because the maker shaped it by hand rather than trimming from a sheet. Any stitching is a little uneven and usually done with wool or thick cotton, with knots tucked inside.
A factory panel hat shows the opposite: crisp cut edges, identical panels, perfectly regular stitch length, and polyester thread that catches the light with a faint sheen. None of this makes a factory hat bad. Plenty of them last for years. But if you are paying a handmade premium, you should be getting the asymmetry, the raw edge, and the felted-in loop that come with it.
Whichever construction you choose, seams are the first place to check when a hat comes out of the wash or starts to feel loose. Catch a lifting stitch early and a few minutes with a wool needle will save the hat. Ignore it and the felt itself will start to tear at the join, and that is much harder to fix.
Handmade from 100% natural wool felt. 7 colors, classic and bucket styles, one size fits most. $19.99 with free US shipping and 30-day returns.
Shop DIVELUX sauna hats →